It's been a minute (Ok, more like a year) since I last posted. Life has been moving along pretty quickly for us. Especially the last few months. Long story short, I was medically discharged from basic training and Caleb got out of the Army the following week. We weren't really planning on that, so my husband's idea for what to do while I was at basic wasn't going to work with both of us. So plans changed. We moved to Arkansas! We are living with my parents since we had to move on short notice, and Caleb is probably going to go to a school for several months. I'd rather live at my parent's house while he's gone and save money than live alone waiting on him to get home.
Most people would be pretty bummed about moving back in with their parents, but honestly, my folks are cool, y'all. We might as well have the whole back of the house to ourselves. We try to keep everything pretty neat though. And our furniture wasn't all going to fit into the already furnished house without some major moving around. So we bought a cargo trailer for our move. We'd been wanting to get one anyway, so why not?
Originally, we were going to get a small cargo trailer so we could just put our crap in it and use it for the dirt bikes later. Well, we had a lot of crap. So we got a bigger trailer. A car hauler trailer. It's 20'X8'. Right now we only have one dirt bike (I'm sure that will change before long), and honestly, as much as I love my husband and I love watching him race, I do not love sitting outside in a folding chair between races while the wind is blowing and the dust is flying in my face all day. So we decided to convert our cargo trailer into a kind of toy hauler. Here's how we did it.
 |
| The before picture |
We started by ripping out the cheap "borders" that were covering the seams of the plywood. It was coming off the wall in places after only having the trailer a few weeks. And it looked like trash - so that's where we put it. In the trash. Then we replaced it with 1"x4" boards. This way the seams would be covered, it wouldn't look like trash, and if we needed something besides plywood to mount things to, we had it.
 |
| The walls have been stained. The floor is next! |
Next, we stained the walls. We were pretty lazy about this stain. We used Thompson's oil-based Walnut stain. It has a sealant in the stain, so it should keep the wood from soaking in any water. Not sure why we would get water all over the interior walls, but we do some weird stuff sometimes, so better safe than sorry. We also chose this stain because we could be really lazy about putting it on. We didn't have to put on a bunch of coats. Or sand between coats. Or paint it on then wipe it off. Or put it on with a clean rag. We straight up just used old paint brushes to put on a single thin layer and let it dry. The lighting on the picture isn't very good, but I think it turned out pretty good! We didn't put any polyurethane on the walls or anything. Because, again, we're lazy.
Next, we wanted a partition so we could have the "chilling" area and the garage separate. We were going to put a doorway between them, but ultimately decided it would take up too much space. Even just having a hole in the wall there would be kind of a pain because it would mean we couldn't put a tool box or riding gear there, and we couldn't put anything on the wall. The box looking thing you see in the trailer is the beginning of our partition. Caleb simply cut some 2"x4"s to size and screwed them to the 1"x4"s that were screwed into the steel supports in the trailer so it would be sturdy. We had thought of just using a couple sheets of plywood and screwing them directly into the 1"x4"s, but we wanted it to be sturdy enough to lean on, and heavy duty enough to hang stuff on the wall. So there are a couple 2"x4"s in the middle there as well so we have some studs to screw things to.
 |
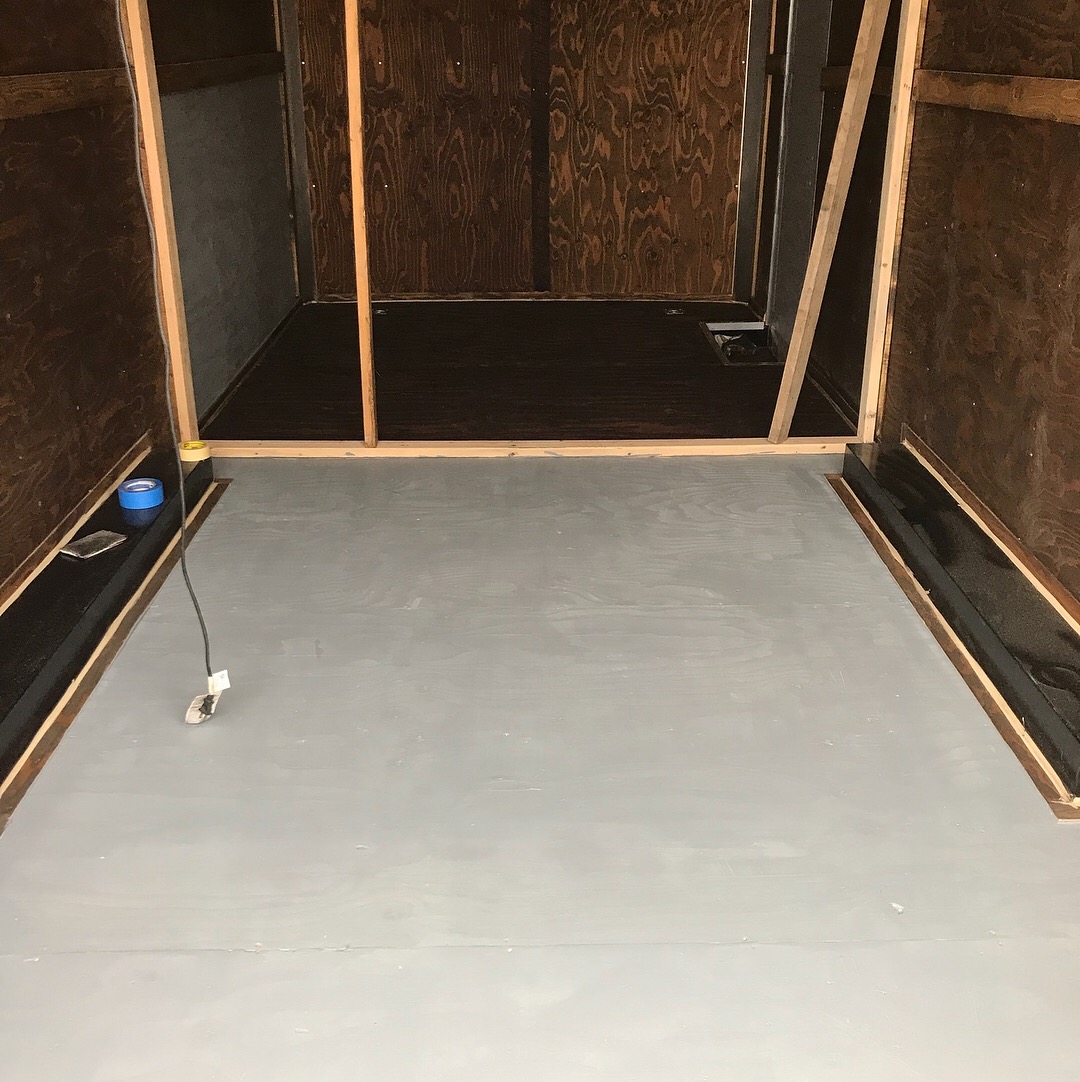
| The floor in the living area |
We decided to paint the floor in the garage area with a gray colored garage floor paint. We used it because it is supposed to seal the floor and not allow oil and other spills to soak into the wood. It's meant for use on concrete, but it painted the wood just fine. It needed more than one coat, but it didn't take long to dry.
 |
| The floor in the garage after the first coat of paint |
We were going to put a few coats of polyurethane on the floor in the living area, but it kept raining so we couldn't leave the trailer open to let the stain dry. And Christmas (and therefore family) was coming to the house, so we needed to get our project cleaned up and out of the way. So for now, there is only one coat of poly on the step that leads into the trailer. It looks good, but to get the shine I really wanted we were going to have to put on at least 3 coats. We will get around to that later - after family has gone home and my fingers don't freeze when I walk outside.
You get a little better view of the frame for the partition Caleb put in. The bottom board was just screwed into the floor of the trailer and the side boards were screwed into the wall as described earlier. The board along the ceiling doesn't go quite all the way to the ceiling. We didn't want it completely closed off because that's a lot of work for literally no reason. We used a couple of L joints to secure the ceiling board to the boards on the side and we used L joints again to secure the "studs" to the top and bottom boards.
 |
| The step before the poly |
 |
| The step after the poly |
For the rest of the partition, all that was necessary was to cut the plywood to fit, and screw it to the frame and studs already built in the trailer. We threw some stain on it real quick, and Caleb did not wait on it to dry before he put his posters and race numbers on the wall. I'm sure the backs of those things have some stain on them, but aside from that, there were no adverse side effects. Caleb screwed the wheel chalk into the trailer and didn't even let me take a picture before he put his bike in there (to be fair, I didn't ask. It was cold.) There's enough room to put at least three bikes in the garage part of the trailer, but since we only have one right now, we won't bother with additional wheel chalks or tie downs until later. We also didn't paint the ramp yet because this photo was taken during the only 30 minutes of sunshine we've had in a week. We put grip tape down on the ramp so there's no chance of slipping while loading the bike (honestly, Caleb would probably never slip. But I would. I would probably slip at least twice any time I tried to load the bike. Or anything else, for that matter. And yes, we put a strip of grip tape on the step into the front part of the trailer too).
 |
| The finished (mostly) product |

 |
| The living area! |
And finally, we have the living area. Again, we didn't finish staining that wall because we are lazy. I'll do it later. After the temperature rises above 30 degrees. You'll see the couch mostly covers up the gray wall mistake, and our area rug (which I stole from my little sister's horse trailer. Thanks, Jessica!) covers up the fact that I haven't finished doing poly on the floor yet. I will note, we did have to put the couch in before putting the wall up. It's just a little too big to fit through the man door. No big deal though. We don't really plan on taking it out (until I get the motivation to do the poly on the floor.. So maybe never, but definitely not until it gets warmer). And honestly, it wouldn't be all that hard to. Just a few screws and that plywood would come down and we could haul it out of there.
The living area is obviously not finished. We plan to put a small TV where our old license plates are at so we can watch TV and maybe play xbox when we are staying at the track overnight. We're going to be putting in some rope lights along the top of the living area and the garage here in a couple weeks when we get the chance. Eventually we will add a window and a real latch to the man door since right now it can only be opened and closed from the outside. We'll also put in a fan that goes into the roof, and maybe some shelves. But again. That's a project for 30+ weather.
 |
| We'll put in a shelf and a TV here. |
 |
| The beauty of a leather couch is it can get dirty! |
We also thought about putting polished aluminum on the bottom half of the walls, but it was $60 for a 3'x3' square. Not only are we lazy, we're also cheap. So we skipped that part. Although it would have looked pretty awesome. We may add it later, but I highly doubt we will stop being cheap anytime soon.
So there you have it. That's how we turned our cargo trailer into a (kind of) toy hauler in under a week; and for less than $300! We had a lot of fun doing this and it was definitely a good exercise in both communication and patience for both of us. I'm not exactly skilled with construction, but Caleb was a Seabee, so I learned a lot! We would honestly love to do this again, so if someone wants to buy this one, we are willing to sell it so we can start over!
Until I remember I have this blog again, Merry Christmas, everyone!
No comments:
Post a Comment